The Sitecore Install Framework (SIF) uses configuration files to install Sitecore and configure the whole environment. Before you are going to install Sitecore you need to download the right files for your topology. On the download site you can find three different options.
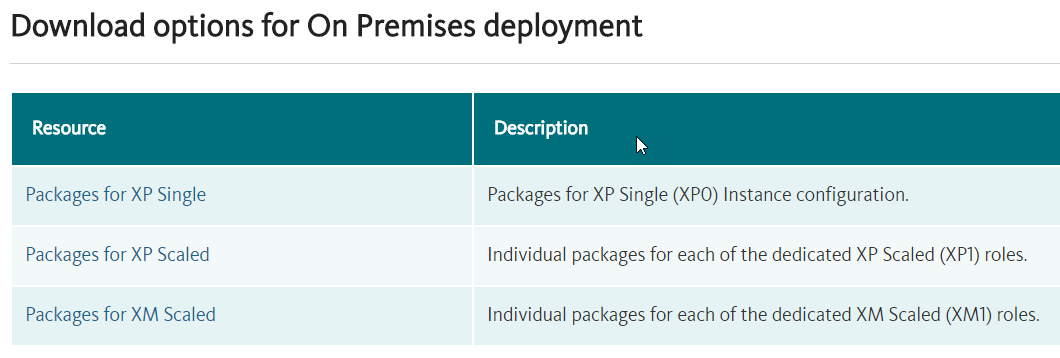
For an on-premise installation you will be using the XP Single installation. This will install all the components on one machine.
The XP Scaled and XM Scaled are typically used for production environments where you can choose on which servers you want to install the components.
Download the XP Single package to your machine and extract the contents to a folder. I will be extracting the contents to C:\Sitecore\Installation\9.0.1\XP Single.
You should now have the following files:
- Sitecore 9.0.1 rev. 171219 (OnPrem)_single.scwdp.zip
- Sitecore 9.0.1 rev. 171219 (OnPrem)_xp0xconnect.scwdp.zip
- XP0 Configuration files 9.0.1 rev. 171219.zip
Now extract the contents of the XP0 Configuration Files package in the folder itself. In the folder you should now have the following configuration (json) files
| sitecore-solr.json | This SIF configuration file creates the Solr indexes that are used by Sitecore. |
| sitecore-XP0.json | This SIF configuration file sets-up the stand-alone Sitecore website on IIS and the content databases on SQL Server. This configuration uses the Sitecore 9.0.1 rev. 171219 (OnPrem)_single.scwdp.zip WDP package |
| xconnect-createcert.json | This SIF configuration file creates the self-signed client certificate which is passed to the xconnect-xp0.json and sitecore-XP0.json SIF configuration files. |
| xconnect-solr.json | This SIF configuration file creates the Solr indexes that are used by xConnect. |
| xconnect-xp0.json | This SIF configuration file sets-up the xDB and xConnect web services on IIS, the xDB databases on SQL Server, and secures them with the provided certificates. This configuration uses the Sitecore 9.0.1 rev. 171219 (OnPrem)_xp0xconnect.scwdp.zip WDP package |
Each of these SIF configuration files requires a separate set of parameters that must be passed to them during the installation process. We will have a look later on how to provide these parameters.
Finally, copy a valid license file to the folder which has all the configuration files and the WDP packages.
Now we have all the files in place to start the installation. The installation is driven by a PowerShell script. Create a new file in the folder called “install.ps1” and paste in the following script:
#define parameters
$prefix = "sc901demo"
$PSScriptRoot = "C:\\Sitecore\\Installation\\9.0.1\\XP Single"
$XConnectCollectionService = "$prefix.xconnect"
$sitecoreSiteName = "$prefix.local"
$SolrUrl = "https://localhost:8983/solr"
$SolrRoot = "C:\\solr\\Solr-6.6.2"
$SolrService = "solr-6.6.2"
$SqlServer = "(local)"
$SqlAdminUser = "sa"
$SqlAdminPassword="sa"

#Install client certificate for xConnect
$certParams = @{
  Path = "$PSScriptRoot\\xconnect-createcert.json"
  CertificateName = "$prefix.xconnect_client"
}

Install-SitecoreConfiguration @certParams -Verbose

#Install Solr cores for xDB
$solrParams = @{
  Path = "$PSScriptRoot\\xconnect-solr.json"
  SolrUrl = $SolrUrl
  SolrRoot = $SolrRoot
  SolrService = $SolrService
  CorePrefix = $prefix
}

Install-SitecoreConfiguration @solrParams

#Deploy xConnect instance
$xconnectParams = @{
  Path = "$PSScriptRoot\\xconnect-xp0.json"
  Package = "$PSScriptRoot\\Sitecore 9.0.1 rev. 171219 (OnPrem)\_xp0xconnect.scwdp.zip"
  LicenseFile = "$PSScriptRoot\\license.xml"
  Sitename = $XConnectCollectionService
  XConnectCert = $certParams.CertificateName
  SqlDbPrefix = $prefix
  SqlServer = $SqlServer
  SqlAdminUser = $SqlAdminUser
  SqlAdminPassword = $SqlAdminPassword
  SolrCorePrefix = $prefix
  SolrURL = $SolrUrl
}

Install-SitecoreConfiguration @xconnectParams

#Install Solr cores for Sitecore
$solrParams = @{
  Path = "$PSScriptRoot\\sitecore-solr.json"
  SolrUrl = $SolrUrl
  SolrRoot = $SolrRoot
  SolrService = $SolrService
  CorePrefix = $prefix
}

Install-SitecoreConfiguration @solrParams

#Install Sitecore instance
$sitecoreParams = @{
  Path = "$PSScriptRoot\\sitecore-XP0.json"
  Package = "$PSScriptRoot\\Sitecore 9.0.1 rev. 171219 (OnPrem)\_single.scwdp.zip"
  LicenseFile = "$PSScriptRoot\\license.xml"
  SqlDbPrefix = $prefix
  SqlServer = $SqlServer
  SqlAdminUser = $SqlAdminUser
  SqlAdminPassword = $SqlAdminPassword
  SolrCorePrefix = $prefix
  SolrUrl = $SolrUrl
  XConnectCert = $certParams.CertificateName
  Sitename = $sitecoreSiteName
  XConnectCollectionService = "https://$XConnectCollectionService"
}

Install-SitecoreConfiguration
@sitecoreParams
Once you have modified the script to fit your situation, open a PowerShell Console with administrative
privileges. Go to the folder that contains the install.ps1 and run .\\install.ps1
The installation itself will take around 7 minutes. Once completed you should be able to visit the site locally at http://sc901demo.local. Congratulations you have now installed the Sitecore Experience Platform!
As you have seen SIF plays a large role in the whole installation process. SIF has been architected to be very flexible and extendable. You can customize the whole setup process to fit your own requirements. In the next blog post we will have a look at SIF and see how you can leverage SIF and to add your own tasks.